New Project: Small Solar off-grid system
About this article.
In this blog post I’m attempting to distill weeks of online research and my own experience of building small off-grid solar system into short and sweet blocks of information. I’m not going to go into excruciating details about how technology works (i.e. AGM batteries vs. flooded). Instead I will provide links to very useful articles. If you don’t care about how and why parts, feel free to skip summary paragraph where I provide all the components I got to do build the system.
Declaimer and Warning.
Electricity is dangerous! Even with such a small solar system, there’s still a risk of being electrocuted or setting your house or shed on fire. Please do everything you can to stay safe, and I will absolutely will not be held reliable for any injury death or property damage. Please use this guide at your own risk and discretion!
Playing with solar panels is something I wanted to do for a while, but didn’t really have room for. I have tried and gave up on build my own solar panel individual solar cells (it was too much works and actually cost more than buying pre-made quality panel).
Now that I moved to my new home I’m finally able to pursue this interesting project.
Besides learning factor, I actually had a need to light up my backyard at night on demand, since I have many wild animals in my area (bears, coyotes, etc.) and have to walk my dog after dark. It took me about a month to set everything up (in my shed), but its still work in progress.
As with any other solar project, first step is to calculate how much energy you will really need. I didn’t find any good online source for this, as most are dealing with large solar system for the whole house.
You can measure all the devices that you going to connect to solar system and measure how much energy they consume with a very handy kill-a-watt device. Or you can guesstimate how much energy you will need and leave some room for expansion. That’s the root I took.
At minimum I need as little energy as needed to light up outdoor 50Watt LED light and some smaller lights inside the shed, at maximum have small backup during power outages to charge phone, tablet, cable modem, router, etc.
So what components do you need to build a small off grid system?
- Solar Panel
- Charge Controller
- Deep cycle battery
- Power inverter
- Mounting system
- Wiring, Fuse(s)
Solar Panel
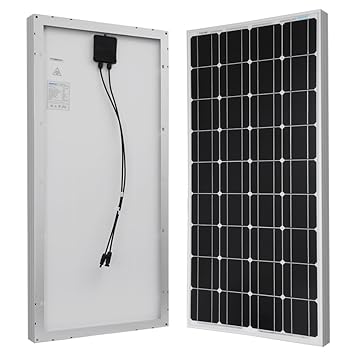
I chose 100 Watt panel, simply because it seems like a nice round number. I didn’t want to go under 100W and didn’t’ want to pay over $150. So Renogy’s monocrystalline panel seems like a good choice and had lots of great reviews on Amazon. I was pleasantly surprised by quality build of the panel, however I didn’t realize that it would be so heavy. Initially I was hoping to re-use old Dish Network’s satellite dish mount and attach panel to the side of my shed, but I immediately realized that panel would be too heavy for this. Renogy panel already came with weatherproof MC4 connectors and fuse, so all I needed was to mount and connect it to the rest of the system.
Battery

I had to do a lot of research on this subject. After all I needed to store energy somehow for night use so battery is a crucial part of the design. However you can’t just use any rechargeable battery. Car batteries should be avoided for the reason that they are mostly designed to provide an initial surge of energy to start your car. They also will die very quickly if you discharge them below 50%. For solar system you should only use deep cycle batteries. These are designed for high capacity energy storage, and can be deeply discharged if needed (although that should still be avoided as battery life will get reduced greatly). Both regular and deep cycle batteries are lead acid type, but deep cycle batteries have a lot more lead “skeleton” inside so they are more robust (but also a lot heavier and pricier).
A lot of information about batteries online seems to favor 6 Volt battery banks, however I noticed that this information is really outdated. This is just my opinion/deductions but I do not see why can’t a good 12V deep cycle battery (especially one designed for solar application) is worse than 2 6V golf cart batteries.
Besides battery chemistry and voltage, one more thing that needs to be considered is internal type. There are 3 main types of lead acid batteries: flooded, AGM/Sealed, and Gel.
You can read about their differences in this nice article.
The battery that I chose is Vmaxtanks SLR125 (125Ah @ 12V). At $260 this was the most expensive component of my system.
It’s an AGM (Absorbed Glass Matt) battery type, and main reason I wanted it was due to it’s ability to withstand cold temperatures since my shed is not heated.
Keep in mind that battery article doesn’t mention one weakness of AGM batteries. If they are overcharged, they might release hydrogen (even tho they sealed, they still have safety venting system) and this will damage them since you cannot just add water. This plays important role in selecting right solar charge controller (more on the subject later).
You will need to know how you size your battery (Amps per hour or AH rating) based on what you going to power with it. I used this very handy online calculator for this task. But don’t go by those numbers alone!
There are other factors to consider here. Besides figuring out if battery has enough power to handle your load, you should avoid discharging your batteries below 25% (I’d say try to not go below 50%). Yes these are not car batteries and then can handle to be fully discharged, but it also greatly decreases their lifespan. And since battery is very expensive you really want it to last at least 5 years or more. Here’s a table of charge cycle vs. discharge level for my AGM battery:
| Number Of Cycles | Depth of Discharge |
| 300 | 100% |
| 600 | 75% |
| 900 | 50% |
| 1500 | 25% |
| 3500+ | 10% |
As you can see if you completely drain and recharge battery every day it will last you for about 6 months, but if you stay above 10% it might last you 10 years! This is where battery banks come to play. If you expect high loads, get more batteries connected in parallel. So if you have one battery that discharges to 50%, get a second one and you’ll get total depth of discharge down to 25%.
True, one can argue that doubling batteries to double their life won’t really save you money, in the long run there’s less maintenance and downtime due to having to replace and recycle batteries.
Solar Charge Controller

What is solar charge controller and why it’s needed? Charge Controller (CC) is really needed to provide “good” charge voltage/current to the batteries. Solar panel does not provide constant output of same voltage and amperage. If sun is shining strong on your 100 Watt panel, you’ll probably see something like 20V @ 5 Amps, but as soon as cloud blocks the sun, voltage will drop to 12V (or less). If you connect solar panel directly to battery, in best case you’ll never be able to charge it, in worse case you’ll destroy your battery (and perhaps panel too). This is where CC comes into play. It regulates voltage and current and feeds your battery just the right amount to correctly charge it. CC will not allow too much voltage or it will boost it if there’s too little (at the cost of lower current of course). It will monitor your battery state of charge and will either stop charging when battery is full, or continue to top it off slightly (trickle or float charge). Anyway that’s my interpretation of this, there’s an article that explains it better than I can 🙂
First thing you need to think about when choosing your charge controller is how much current it needs to handle. My panel shouldn’t go above 7Amp, but I got 30Amp charge controller just in case I want to expand in the future.
Keep in mind that there are basically 2 types of charges PWM and MPPT. While MPPT is more efficient I choose PWM because of there’s a huge price difference between it and MPPT. All that information you will find online in various resources however there’s one part that almost nobody mentions and that’s battery compatibility.
WATCH OUT for charge controllers that do not support your battery type!!! I made this mistake when I ordered inexpensive CC on eBay. It had nice LCD screen, lots of menus and even 2 USB power ports, however it did not mention anywhere that it supports AGM battery. And when I connected it I noticed that voltage that it was feeding to my battery was out of spec (at lest for the float mode). This can damage AGM battery in long run. So I returned it and got highly recommended Morningstar . It has setting for flodded/sealed or gel batteries and seems to be very reliable. Too bad it didn’t have all the bells and whistles of the no-name eBay CC (such as USB charging ports). Keep in mind that MorningStar is pricey. PS-30M with LCD screen goes for around $180 new, but I was able to find used one on eBay for $135.
Final note on CC. Most of them have so called DC load output. This is terminal where you can connect your DC device. So if you have utility light you can connect it there. Naturally I assumed that it regulates voltage to 12V on this output. WRONG! It’s basically a shortcut to the battery, so you will get whatever voltage you battery is at (could be as high as 14V during charging). Only advantage DC load port has is that it will shut itself off if battery voltage is too low. That’s why it’s also called LVD or Low Voltage Disconnect. Additional on some fancier CC models can setup scheduled power on/off which is useful for garden lights, water system, etc.
Power Inverter

You are probably familiar and already have a power inverter if you own a car. Inverter is a device that converts DC (direct current) into AC (alternating current) as well as increases voltage (i.e. from 12V DC to 110V AC). You solar panel, charge controller and battery all output DC. Most household appliances require AC to function. Voltage varies from country to country (110-120V in USA and 220-240V in Europe for example).
This is probably the most straight forward part of the solar system. You plug your lead acid battery to the inverter’s input, and plug your appliance (be it a light, a drill or TV) into output outlet(s).
And just like with household power outlet there’s enough electricity that’s created here to cause injury or death, so please be careful!
To select right inverter, one needs to take a look at two things. Wattage rating and type. Wattage is a bit tricky so let’s first talk about type. Type can be either modified sine wave or pure sign wave. Modified = cheap, pure = expensive. Purse sine wave inverter give out clean power, just like your household power outlet. Modified sine wave inverters on the other hand will probably work with most devices but will give you troubles if you are running electric motors or old CRT TVs (who still has those anyway?). Pure sine is probably safer for sensitive electronics too. I chose pure wave just to be safe.
As I mentioned Wattage is a little tricky. Initially you’ll want to choose inverter that will provide enough power or maybe even some extra just in case. However do not forget where it gets its energy – lead acid battery. Make sure you do not draw too much power or you will damage your battery and might even create fire by melting connecting wires.
In my case I chose Power Bright 600Watt pure sine inverter which is definitely overkill. In theory my 125Ah AGM battery can handle 1000Watt inverter for short time, but experts were actually recommending that I should not get anything above 300 Watt. Pay attention to peak and constant wattage rating. Peak might be advertised as high as 1kW, however inverter will only tolerate it for few seconds.
Final note. If you plan to use inverter in remote location, you’ll probably want some way of remotely shutting it off when not used. Inverter draws some power from battery even when it’s not outputting anything so it’s best to keep it off. My Power Bright inverter actually came with RJ-11 type control port (which was not even mentioned anywhere in the manual). I figured out how its wired, and it’s actually very easy to make custom cable to control it. Then you can either use microcontroller (i.e. Arduino) with relays and RF receiver or off the shelf remote control to shut inverter on or off. I’ll try to cover this in separate blog post.
Cables and fuses
Since we already covered inverters, let’s talk about wiring. This is extremely important topic.
First let me mention what I learned about wire/cable types. In USA wire diameter is measured in gauge or AWG (i.e. 6 AWG). The smaller than number the bigger the diameter. This only applies to the metal conductor part, not the outer jacket. Besides wire thickness it can be solid or stranded.
Cable between battery and inverter.
You MUST select correct wire gauge for connection between battery and inverter. Main reason is current. These wires can have really big current going thru them which not only heats them up, but can easily melt and burn them if they are not thick enough. Take a look at this short Youtube video for a demonstration 🙂
You can easily have 60 or more Amps going thru battery cables. Wattage=Voltage*Current.
Let’s say you have 600 Watt inverter (like mine).
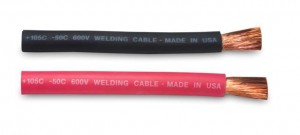
600W=12*I, so I=600W/12V= 50A. And in case of 1000 Watt surge, we have 80A going those wire. That is A LOT of current. I won’t go into details about how higher resistance creates more heat in conductors, but just mention that the thicker and short wire is the more current it can handle. Wires used between inverter and battery should be short (under 10 ft), use multi-stranded copper conductor (do not use solid!) and have gauge of about 6-4 AWG for inverter that’s around 500 Watt. Inveter’s manufacturer usually will provide gauge recommendation for you.
For my setup I chose 5 feet (2 pieces) of 4 AWG welding cable (about $20 on eBay). Welding cable is great quality all copper wire that’s very flexible, and easy to work with. Here’s a quick tip: if you want flexible wire, search for “silicone wire” as most of the wire stiffness comes from its insulation.
You can either buy just the wires or wires that’s been terminated with correct size lugs. I chose to save money and attach my own lugs. My VmaxxTanks battery has 5/16″ terminals and inverter has 1/4″. But I used same 5/16″ tinned copper lugs (as bare copper oxidizes quickly) for both ends. I got 10 pieces for about $8 on eBay. You can even make your own lugs if you have right diameter copper pipe. I stripped ends of the wire with utility knife, dipped them in flux (do not use too much as it will corrode copper over time), inserted into lug and using hammer and chisel crimped it (or you can buy special crimping tool). Then I heated lug with torch and fed some solder into it. This video explains the process.
I probably should mention fuse here.

It’s a very good idea to have a fuse between battery and inverter. After attaching lug I cut red positive wire and installed inline fuse holder (like this one) with 60A gold fuse. It’s recommended to attach fuse close to battery terminal so that’s how you will choose where to cut wire.
Cables from solar panel to charge controller
When choosing wires for solar panel connection you need to consider 2 things. 1st is gauge and that will depend on the length of the wire (or distance between panel and CC). The longer the distance the more voltage drop will be so you will want to choose thicker wire so you don’t lose too much power.
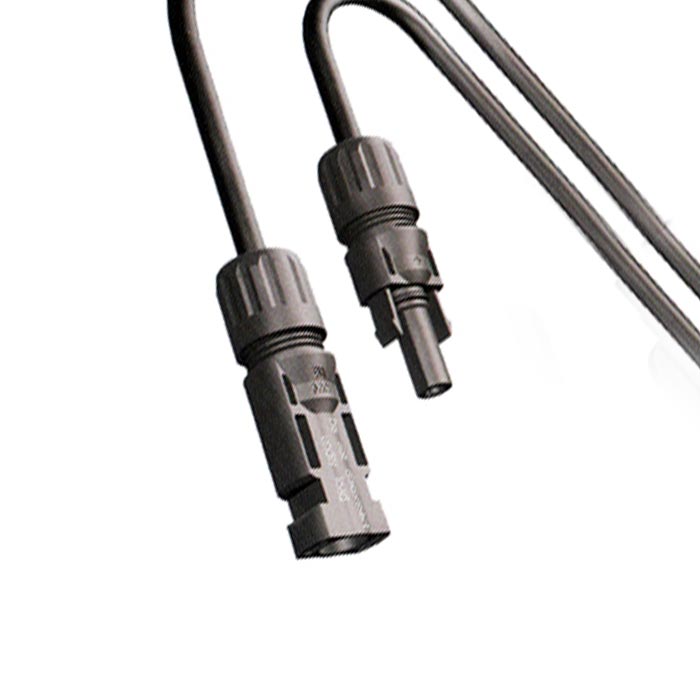
Second thing to consider is if that your cable will probably be exposed to elements and sun, so you should choose weatherproof cable.
For my setup I chose pre-made 10 AWG MC4 (MC4 is type of waterproof connector that matches one on the solar panel) cable. I ordered 50 feet cable off eBay for about $30. I then cut it in the middle so now I have 2 25 feet cables which have MC4 connectors on one end and bare copper wire on the other. MC4 were plugged into receptacles on the solar panel, and bare ends were stripped to right length and connected to charge controller PV ports. Always pay attention to polarity!!!
Small note about cable that I used. It’s very high quality extremely durable cable high heat and water proof, but this made it huge pain in the arse to work with. It’s very inflexible and insulation is darn hard to remove. So make sure you have good wire stripper and pliers.
Wires from Charge Controller to battery
Now you will want to connect your battery to CC. For short distance gauge of wire is not that important (unless of course you have a lot of current going), but I choose same 10 AWG wire that I used to connect CC to solar panel. I cut 2 5 feet pieces from it. Stripped both ends and crimped ring terminals (5/16″ diameter) to one end. These ring terminals are sold in any auto store and most hardware shops. Connect ring terminals to the battery posts and other bare wire ends to the charge controller battery screw-in ports. Always check right polarity!
Wires to the light/load
You’ll need to figure out how you going to connect your AC light or other devices to the inverter so these will be different depending on your application. You might use extension cords if it’s indoor or build your own cable. I built my own and used 16 AWG service wire to connect to the outdoor light with some adhesive lined heat shrink tubing to make watertight connection. Other end was attached to regular outlet plug and connected to the inverter initially. I’m currently working on Arduino based controller for this, so it will be connected to the inverter via relay.
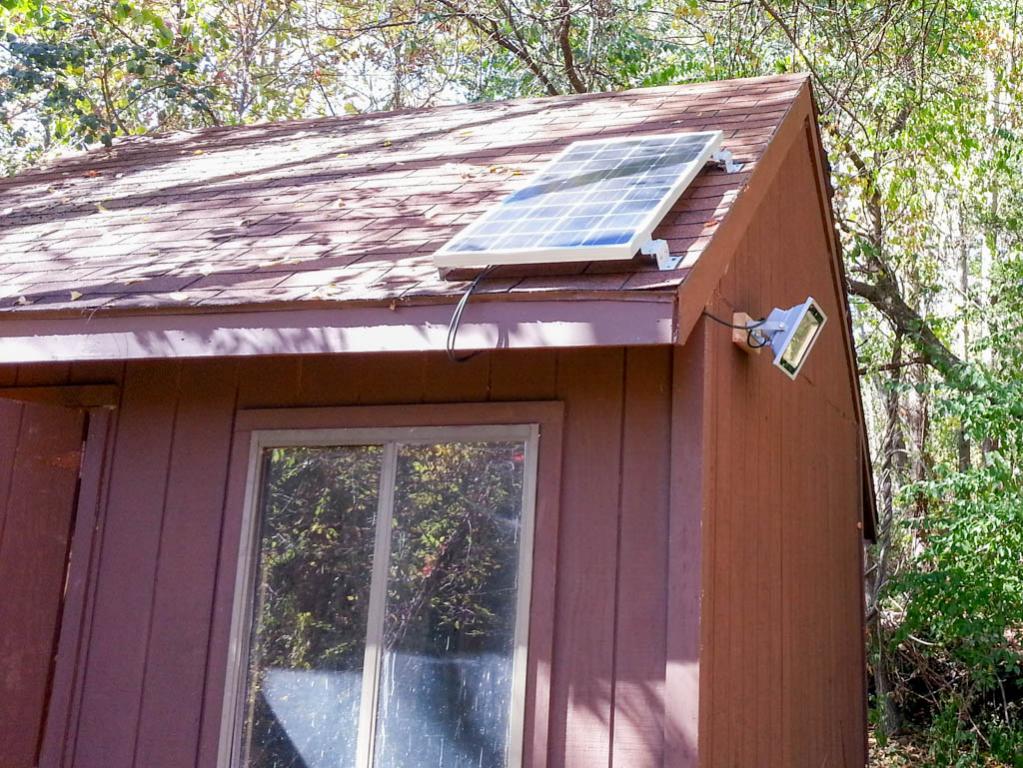
Mounting Solar Panel

This was probably the most difficult part of the project. At first I couldn’t decide how to mount them. I really didn’t want to touch the roof because I kind of dislike heights and also didn’t want to damage it in the process. Besides my shed’s roof is at a very steep angle, I doubt I can walk on it… One more issue with roof, was large branch that grew right above the roof. I couldn’t cut it easily without damaging the roof, and hiring someone would cost $200…
Other options I had was a stationary mount near shed (i.e. pole), or some kind of mount that can be attached to the wall. Wall mount seemed like a good idea, and I was thinking about using mount from old satellite dish. Problem was that this panel was a bit too heavy and I decided not to risk it. Mounting it to the pole would require making concrete base, acquiring pole and a mount.
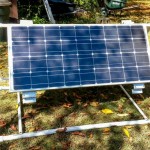
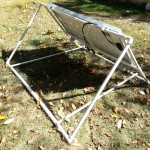
At this point I wasn’t even sure if it will produce enough power, so made free standing PVC mount for my panel out of 3/4″ and 1/2″ PVC pipes. I was actually quite sturdy and nice looking. I will probably write a separate post on how to make one, if you can’t figure it out from the pictures 🙂

So finally I decided to overcome my fears and mount it to the roof. I got Z-brackets made by same company as solar panel, but decide not to use them alone. Problem with Renogy’s z-brackets is that they leave less than 1″ of clearance between panel and roof, which will cause overheating in summer and lower power output as a result. But bigger issue was that I would not be able easily remove panel without unscrewing it from the roof. To overcome these issue I made my own z-bracket out of pieces of aluminum L-channel.
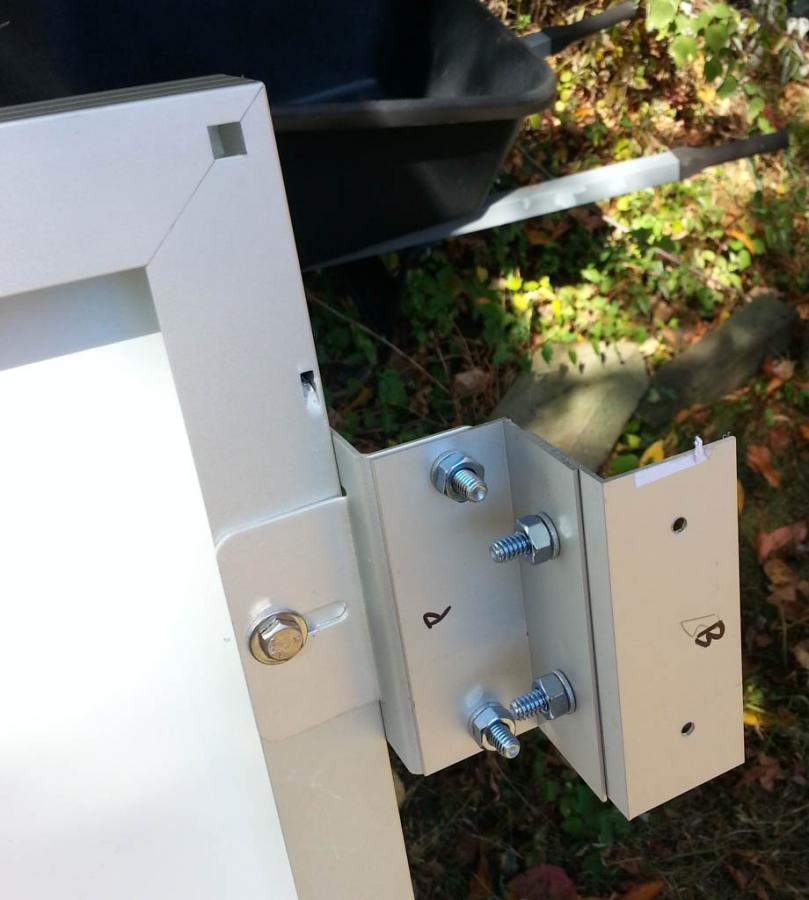
I will cover how I made them in separate post. This gave me pretty nice clearance of about 2+ inches, plus I can now remove panel without taking brackets off.
I was able to attach panel to the roof without actually climbing all the way. Before attaching it with wood screws I put some roofing calk under the brackets to seal any potential leaks.
Summary
As promised here’s part that I give a list of components and cost without any additional information.
- Solar Panel: Renogy 100 Watt Monocrystalline ($150)
- Solar Charge Controller: Morningstar ProStar PS-30M w/ LCD screen ($135 used)
- Battery: Vmaxtanks SLR125 (125Ah @ 12V) ($260)
- Power inverter: Power Bright 600Watt ($164)
- Cables/wires:
- Cable between battery and inverter: Welding cable two 5 ft pieces 4 AWG ($20)
- 5/16″ tinned copper lugs ($8 for 10 pieces)
- MC4 10AWG solar panel cable 50ft ($30)
- 5/16″ ring terminals ($4-5 at local auto store)
- AGU Fuse holder ($6) and 60 Amp AGU Fuses ($4)
- Brackets: Renogy Solar Panel Mounting Z Brackets ($13)
- Misc hardware: $50
Total: $785-$800
This does not include outdoor light, AC wire and wireless controller.