Prusa i3 3D Printer kit. First impressions
Two weeks ago I ordered Prusa i3 Rework 3d printer kit from Replikeo and it finally arrived yesterday.
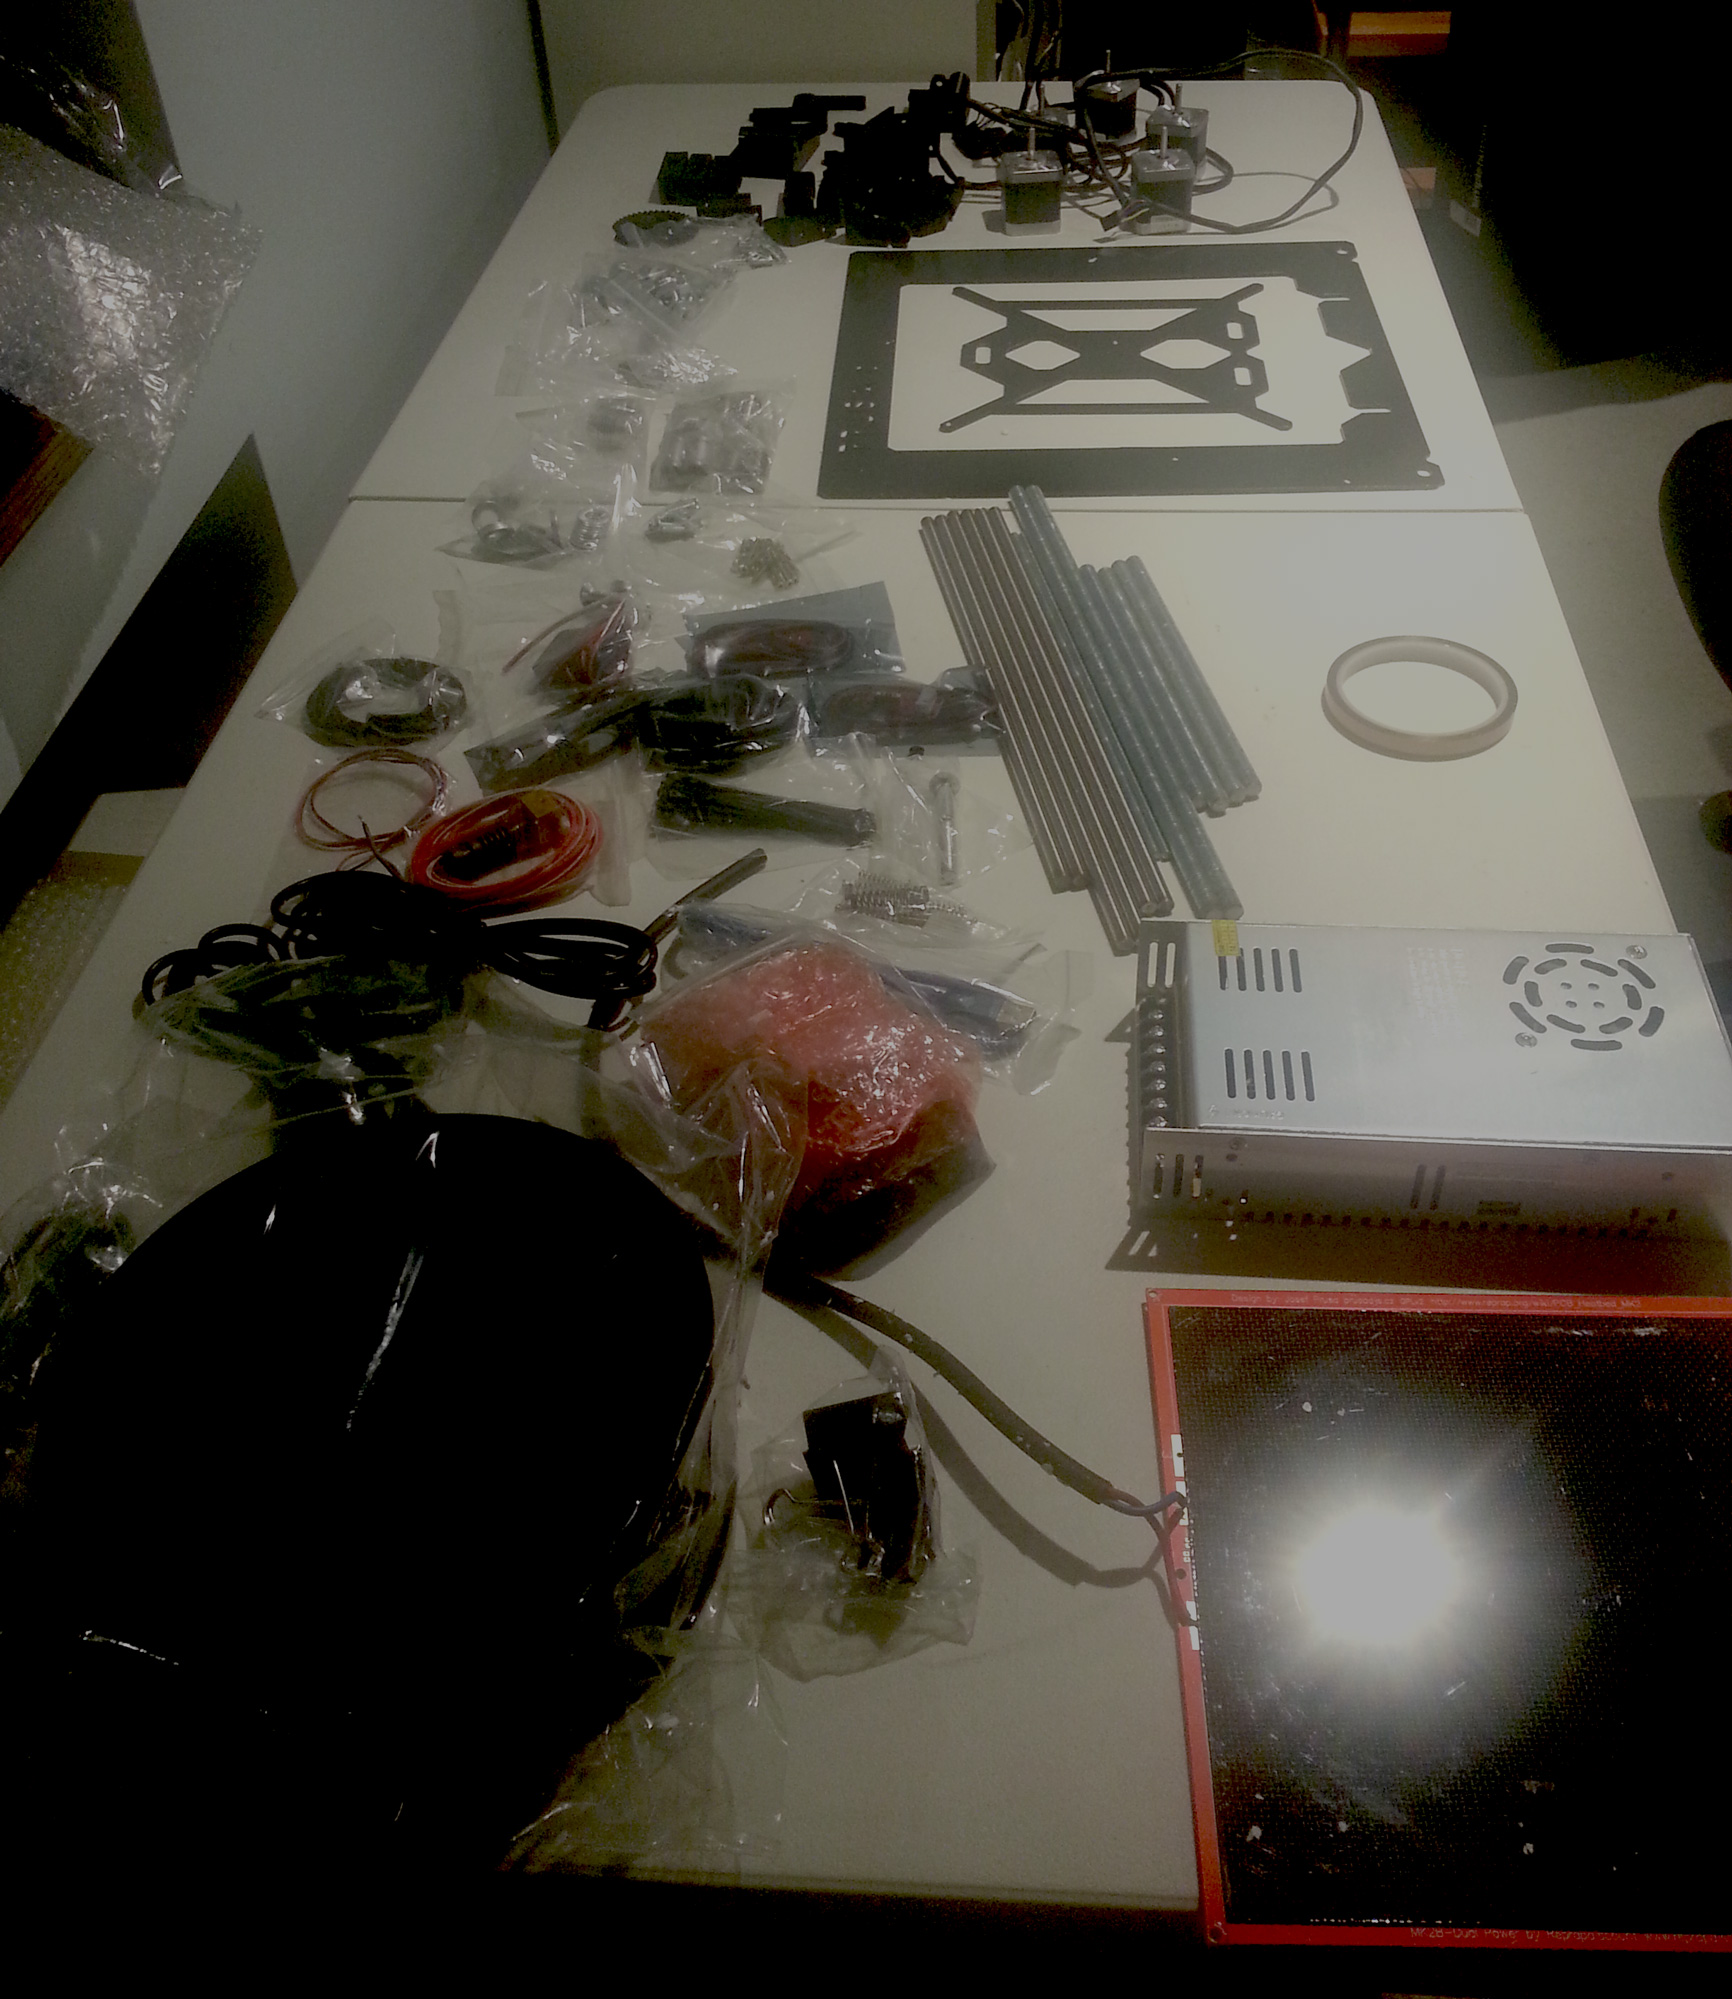
I honestly did not expect to receive it so quickly, so it was a nice surprise. I’ve read some posts about box arriving damaged so I quickly checked everything and it seems Replikeo learned from it’s mistakes. Everything was packaged very neatly into styrofoam compartments. It did not look like anything was damaged in any way.
Here’s what I noticed quickly inspecting parts. Smooth rods were smooth, and looks they either chrome plated or just polished, but they look nice. Too bad one of them was slightly bent. I don’t know if it will affect anything, will see…
As others stated printed plastic parts seem of a low quality, some have gaps between layers, making me worry that it might break soon. As recommended first thing I’ll after I get printer working is to print better quality replacement parts.
I got “iron” frame version which was cheapest option compared to aluminum. I think they meant to say steel instead of iron. I was a little worried about it being half the thickness of aluminum but it seems pretty solid and rigid. It’s powered coated black, but paint is peeling on the inside edges 🙁 At the first look M3 screw holes don’t seen to be tapped, but each has this tiny notch on the edge which let’s you thread M3 screw in. I never seen tread like this, but no big deal…
Everything else seems to be of adequate quality. I was surprised to find what looks like a genuine Arduino Mega R2, not a clone.
Major issue that I have with this kit is lack of any kind of labeling on parts, especially screws. I wish they would just write with a marker diameter and length of each screw on the bags. Fortunately I was able to find my digital caliper and figure out which screw is which 🙂
I couldn’t wait any longer so I decided to start assembly process. That’s where things got really frustrating. Because Prusa i3 is an open source project, it’s difficult to find clear and detailed instructions on putting it together. What makes things really bad is that Replikeo included links to YouTube videos which were not for “Rework” edition of the Prusa i3. Yes there’s a difference and it’s significant for a person who never assembled 3D printer. As I started to follow YouTube video, I got completely stuck because rod lengths and printed plastic parts were different from what I received. Fortunately there’s an official RepRap instructions on how to assemble this 3D printer. I was able to follow it with some difficulty, but it’s doable. Problem was that assembly sequence in YouTube video vs. official instructions varies so I had to figure out how to put things together.
Official manual mentions need to drill holes in plastic parts, but holes seem to be already there, so I’m still not sure if they were pre-drilled or printed this way and if they can be printed why drill at all?
Also Replikeo hardware is still different from pictures on the instructions, but I can adopt.
Before I finish this post I wanted to add a note on LM8UU linear bearings. It’s not mentioned anywhere but at first these bearings are almost not moving on the smooth rood, they are really stiff! But if you move them by hand back and forth they start to slide easier and easier. It does sound like they are scratching the rods slightly, so I don’t know if it’s normal or they just low quality.
So far I only started and it will probably take me few more evenings to complete the assembly, so I will keep you updated.