3d Printer build update (6-13-2014)
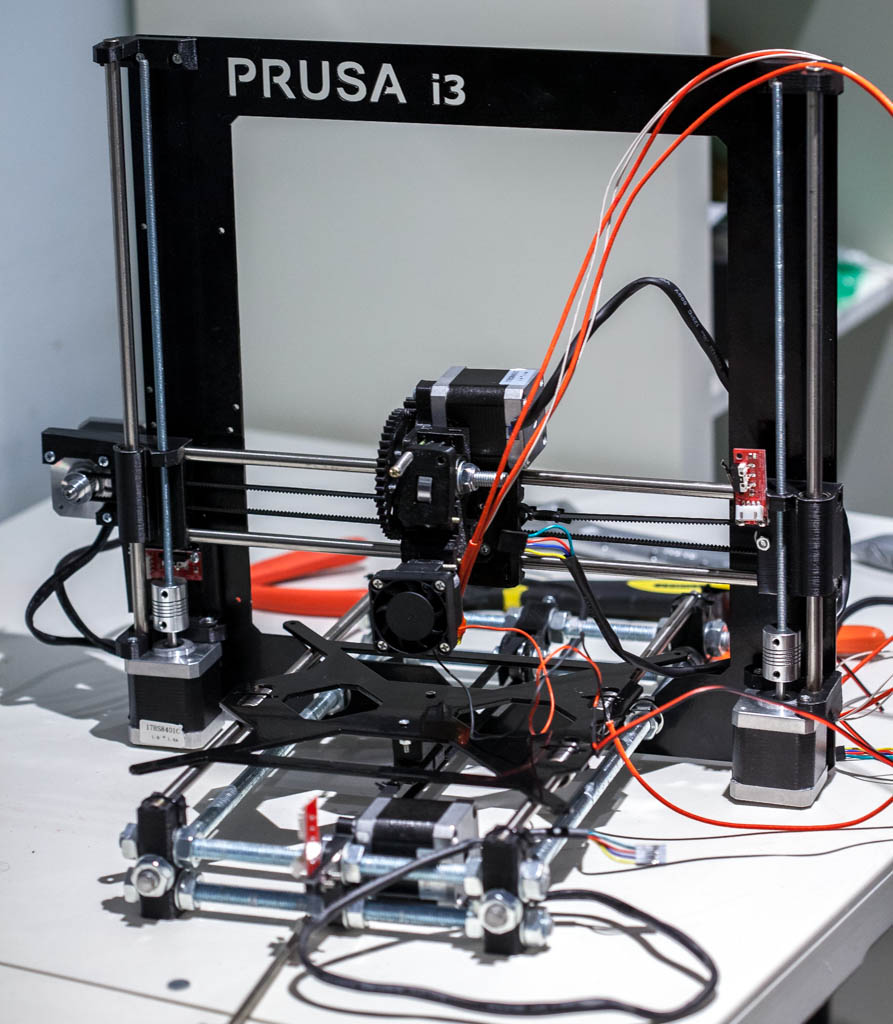
My Prusa i3 Rework 3d printer build has been progressing slowly, but surely.
By now I have everything assembled and connected, but it’s not working just yet. I’d like to share what I learned during this tough build, in case you trying to do the same.
As I mentioned in earlier post RepRap’s official assembly instructions are lacking to put it lightly, but still they will help you assemble your printer. Be aware that some parts of the instructions are just wrong. Here’s list of issues you might expect and how to get around them.
1. Screws
I think everyone who tried assembling this Rework edition, noticed that screws that hold stepper motors are incorrect size! 14mm 3m screws are just too long and will not work, as stepper’s thread doesn’t go that deep. 12mm however are perfect size! I had to cut my 14mm screws with Dremel until I found 12mm screws in local hardware store.
2. Linear bearings (LM8UU)

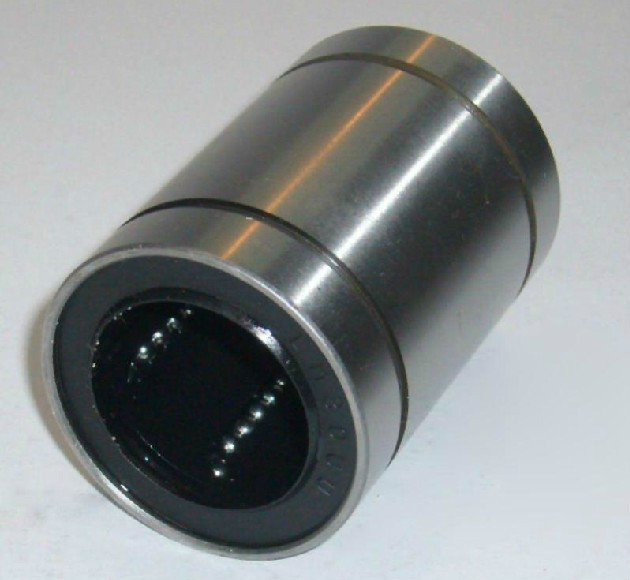
These are suppose to let you slide X, Y and Z axes easily on smooth rods. Mine were not sliding at all. I had to apply significant force to move these bearings along smooth rods. Fortunately if you keep moving them back and forth eventually they will start sliding easy, but still not as smooth as I’d hope. I might need to lubricate smooth rods.
3. Z-axes smooth rods and mounts

These gave me a lot of trouble. In the instructions you suppose to slide them thru top z-axes mounts. But holes on those mounts were much smaller than rods. I managed to slightly crack one of the mounts (nothing serious tho) when trying to force M8 smooth rod down with a rubber mallet.
Much better way is to open up those holes with 8mm drill bit. I didn’t have any metric bits, but I was able to use 5/16″ inch bit with great success. I still had to use mallet but it worked great.
4. Y-axes smooth rods
Holes filled with epoxy
I had issues with these just the opposite from Z-axes rods. They slide too easily thru the right mount, and there’s nothing to stop them from completely falling out! So when extrude moves to right (also due to stiff linear bearings), rods move with it, and fall out. I remedied this issue by putting some epoxy glue in the right holder. I think smooth roods can be still removed if needed, but they will not go thru right end anymore.
5. Endstops
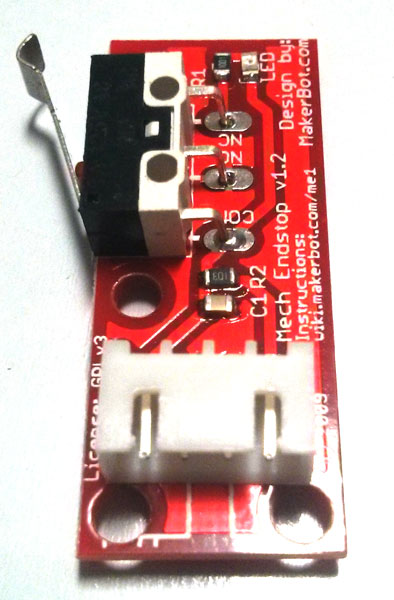
I found two issues with endstops.
First, there’s flaw in the endstop design that came with the kit. Mounting holes located too close to the plug, so they will not go thru and will also block the plug socket. However there’s an easy fix. Carefully pry plug socket with a knife upwards. Pins will bend so you can position it at 45 degree angle. This will let you install screws with ease.
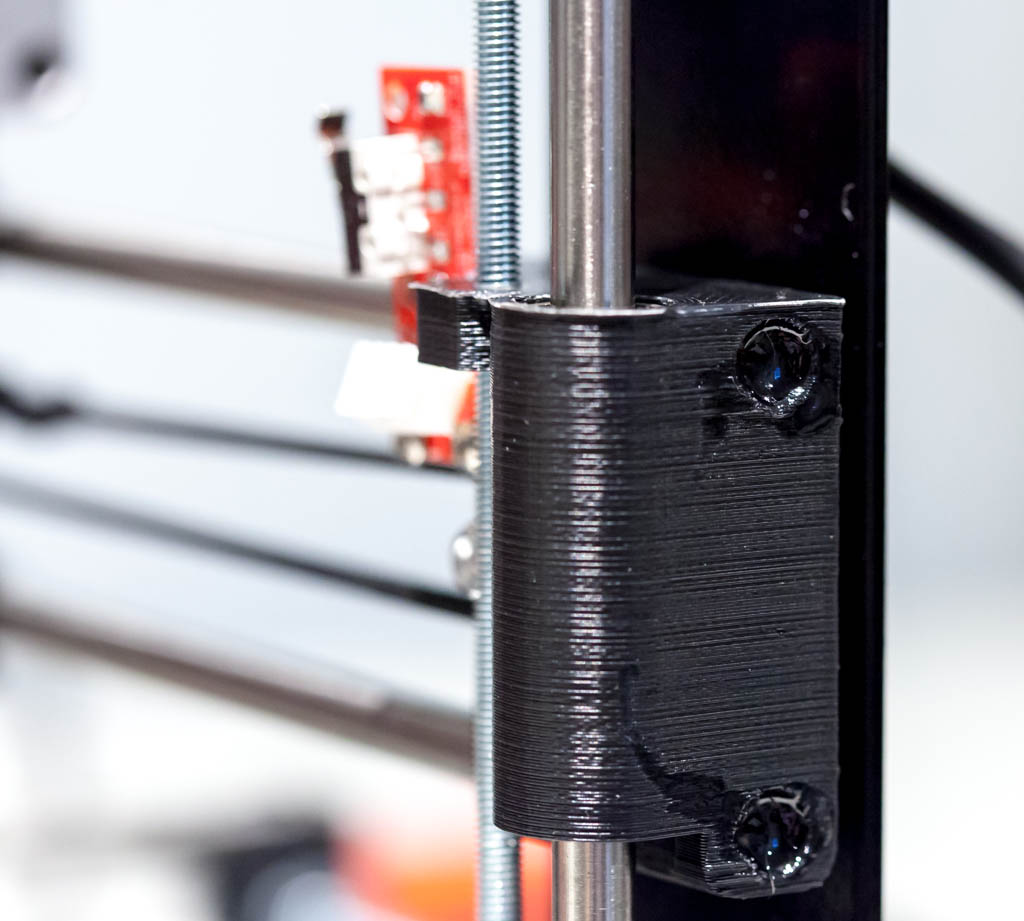
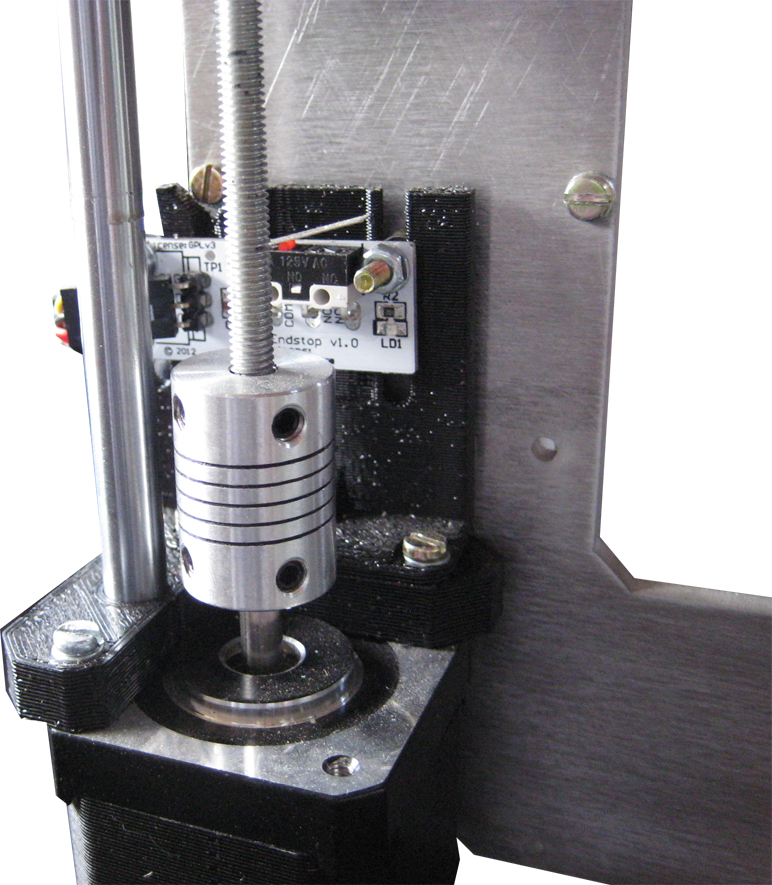
Second, z-axes endstop mounting is awkward. As you can see on official pic, it’s mounted with 2 screws, however right most screw is impossible to adjust because it’s head is sandwiched between mount and metal plate. You will want to adjust it when calibrating extruder height later on. Also because of it plastic mount is not flush with metal plate, there’s simply no room for screw head there. I mounted it with both screws on the left, but it doesn’t hold endstop straight and it’s possible that it will move down if pushed hard.
6. Heated bed (HB)

Almost everyone had issues with heated bed. Its made out of thin PCB so it bows in the middle because it hangs in the air supported by washers. Also since it’s directly above metal mounting plate which serves as giant heatsink, it will have issues heating up. One of the solutions is to add cork insulator beneath. That’s what I did, however it added some un-eveness to the HB.
Also for good or bad Replikeo kit comes with carbon fiber plate instead of glass, and doesn’t add rigidity. I’m going to use glass in the future.
Deviating from official version, Replikeo also includes support springs for heated bed. I actually like them, as they allow you to finely adjust HB height. Just use them in your build instead of 3 washers recommended by RepRap’s instructions.
7. Y motor location
Finally, this was something pointed to me on RepRap forum. Build instructions have an “error”. They instruct you to mount Y motor in front and idler in the back. Sure this works, but makes wiring more messy than it has to be. Nothing wrong with mouting Y motor in the back. I had to flip my frame around and readjust M8 screws on threaded rods so motor can be in the back. And then I realized that when motor is mounted on the left side, it turns in the opposite direction. This can probably be corrected in firmware config file, but I wanted it be right so I flipped it to the other side. This is where I kind of understood why this “error” wasn’t corrected in build manual. Printed Y-motor mount is actually not designed to accommodate motor on the right side. There are indentations where screw’s head goes in so it’s flush with surface. I think it’s just a cosmetic issue tho, nothing prevented me to ignore those and mount motor on the right side, but I see how it can be confusing to first time builder.
8. Ramps 1.4 shield
Kit came with Ramps 1.4 and Arduino Mega. Build instructions tell you to connect shield to Arduino as first step. DO NOT DO IT! Solder extruder fan’s wires first and add mounting standoffs to Arduino. I made a mistake of following instructions and was sorry I did it. Issue here is that there are too many headers you need to connect, so connection is almost permanent. It required significant force to get all pins into Arduino, so when later I realized I need to take it off I had difficult time. I did manage to remove it … together with Mega’s headers! Yikes, those plastic things just came off leaving bent metal guts on the board. I did manage to reattach them back and straighten out, but not sure how many more such removals it can live thru. So first figure out how you going to mount Arduino to the metal frame. Here are instructions again give you wrong information. At least on the frame that I received it has to be mounted with power plugs DOWNWARD and not upward. But you will see this as holes align only this way. I used some thin #4-20 hex standoffs (thicker standoffs will not work, as they would short leads on the bottom of Arduino board) and 4-20 screws to attach Arduino board to the frame. Then I soldered extruder fan wires to Ramps shield (which might not be such a good idea, as you it won’t let you turn off fan which can be very loud and annoying as you are just testing things). Only at this point I inserted shield into Arduino.
9. Stepper motor wire colors.
Replikeo’s motors came with different color wires from what described in the build manual. I asked on the forum, and was told that either way motor will work, but it’s direction will change. So if your motor doesn’t run in the correct direction just flip the connector!
Almost Final Build
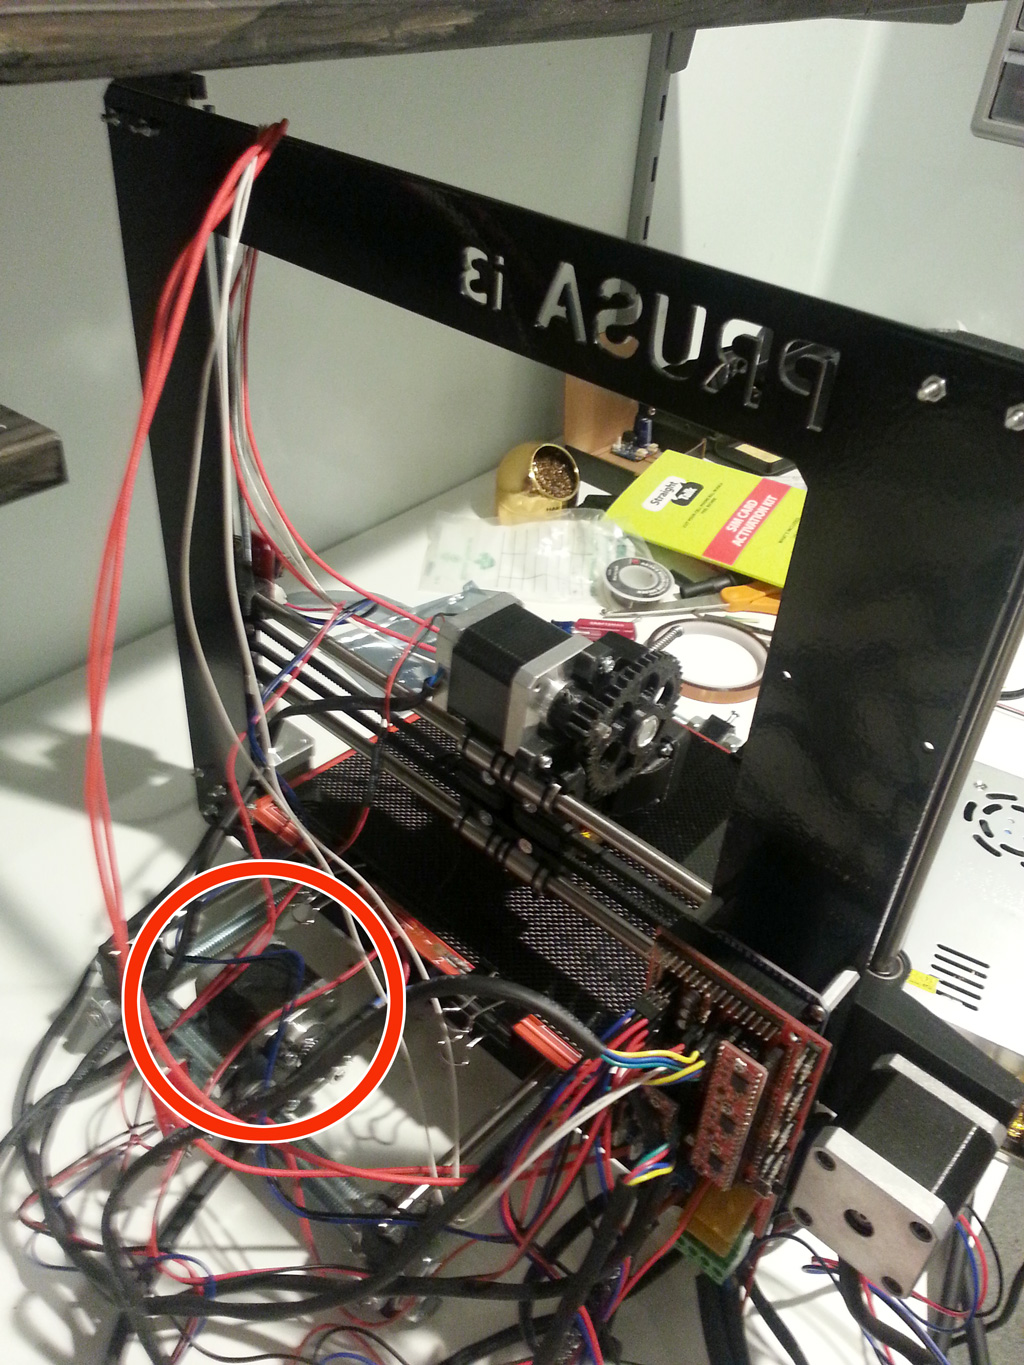
Back side of printer, shows motor mounted they way it should be (IMHO)
![]() It was very late when I finished assembling everything and loaded Marlin firmware with Replico’s config file. I used Printrun program to control motors for manual test. Almost nothing worked as it was supposed to!
It was very late when I finished assembling everything and loaded Marlin firmware with Replico’s config file. I used Printrun program to control motors for manual test. Almost nothing worked as it was supposed to!
Z-axis motors sometimes turn in same direction, sometimes in OPPOSITE! This makes absolutely no sense, as they are connected in parallel. I think stepstick’s trimpot needs to be adjusted to deliver more current (since one drives 2 motors).
Y-axis motor completely stuck, I can hear it’s trying to engage but not moving an inch (if I power off I can move Y-axis by hand freely).
X-axis is the only one that appears to be working, but it behaves extremely bizzare when it hits endstop. When it does hit it, it’s as if motor gets reversed, it won’t move in the opposite direction (says endstop encountered), but will try to move in the same direction when I send command to move other way. Setting “INVERT_X_DIR true” seems to work, with endstop but it moves left instead of right.
And it doesn’t respond to every command, sometimes it ignores it. Again this sounds like a symptom of not enough current delivered from stepsticks, so I will play with those tonight.
My biggest concern is stuck Y-axes motor. I plugged it into X motor socket, and it didn’t help. So either belt is too tight, or motor is dead. I will know for sure tonight when I remove belt and try to idle-run it.