Prusa i3 Rework 3D printer build is DONE!
This is continuation of my previous blog post.
First and foremost, when I say it’s Done I mean, it’s pretty usable at this point. If anything, this experience taught me that RepRap DIY style 3D printer build can never be fully complete. There’s always something that needs to be fixed, upgraded and tweaked in the software. Especially the software part. There’re so many different parameters that need tweaking, and because no two printers are alike you can’t just copy and paste someone else’s settings. Making changes in software/firmware takes really long time because 3D printing is a slow process. It rarely takes less than hour to print a small part, so imagine making adjustment and then waiting for a while to see result. And there are prep steps for each print such as cleaning and applying hairspray, checking bed level, etc.
So yes you do need a lot of patience and time, however despite all the trouble rewards are worth it! Sure you can just buy a fully functional 3D printer that will work great out of the box, but prepare to spend around $2K or more for anything with usable print area. Prusa i3 cost was under $500, and learning process of building it is priceless!
Speaking of learning, I now see a lot of areas where I can make an improvement or even scale print area up. I’m already thinking about building another one 🙂
But enough of that, I wanted to share my final build stages, issues I had and how resolved it (hopefully I can remember all of it).
After successfully printing hollow cube, I tried printing filled one… and failed. It looked just wrong, there was gap between walls and filling. I wasn’t sure what the issue was so I started to mess up with settings in both Slic3r and Repetier firmware. Somewhere in the process I completely broke something in software. Well not just software, but on this later on.
Instead of laying a line of PLA, printer was putting dots of it. I couldn’t figure out issue for couple of days, until I followed instructions for calibrating extrusion length. Process is simple. Mark 50mm of filament above extruder’s plastic top. Extrude 30mm and measure distance to the mark. Ideally it should now measure 20mm (50-30), but on mine it was 34mm. I started to increase my extrusion steps up from 600 and noticed that things improved. Normally this setting is in the firmware, however changing it recompiling and uploading is annoying every time. Fortunately there’s a trick where you can use Gcode (commands that control 3D printer movements, temperature, etc.) to temporary change extrusion steps. Code is “M92 EXXX” where “XXX” is number of steps, i.e. M92 E700.
I discovered that beyond 700 I didn’t see much difference in extrusion length. It maxed out at 28mm instead of 30, but it was actually sufficient. At this point I tried to print another calibration cube, and it came out beautiful! I can see that it was extruding a lot of plastic, probably more than necessary, but somehow it made for a more solid part.
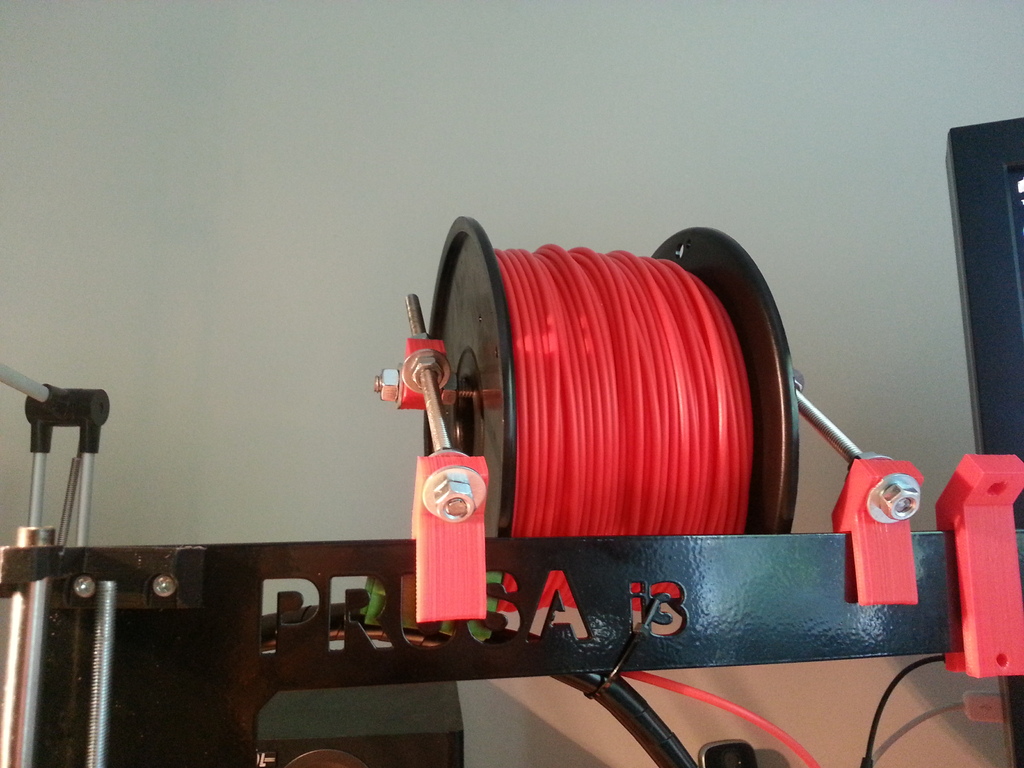
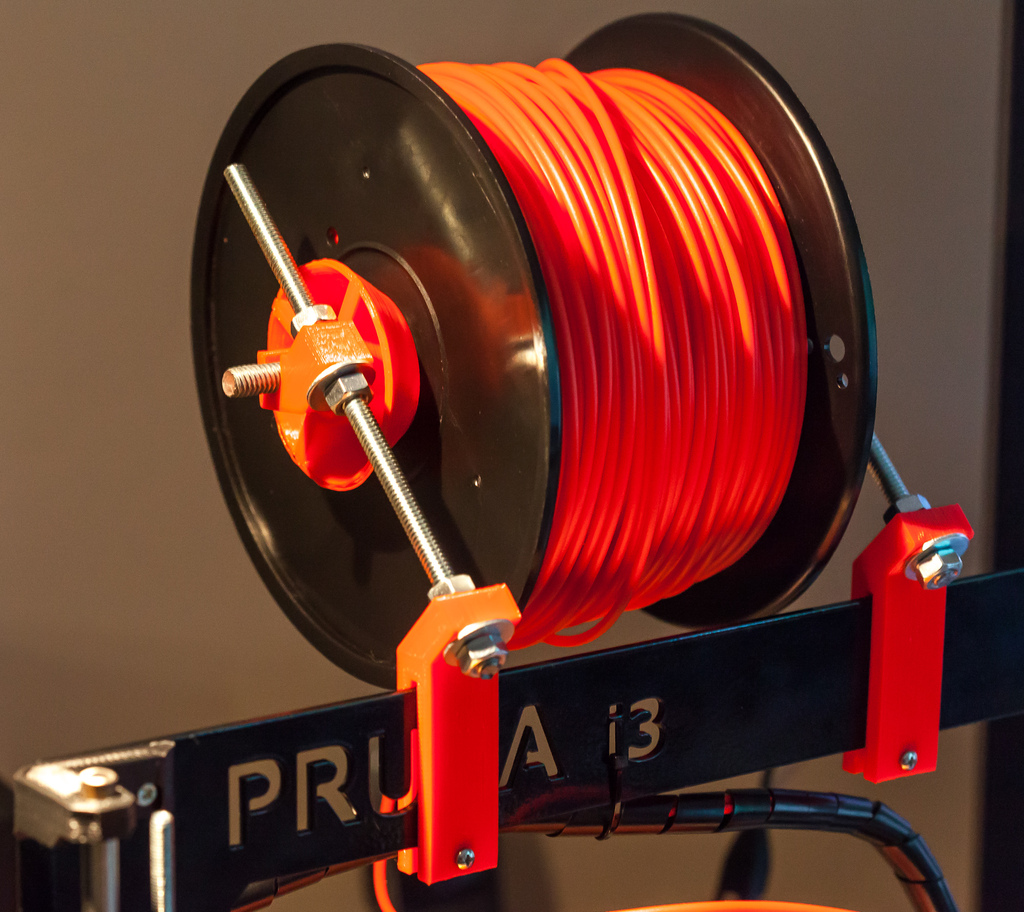
About same time as I was playing with calibration prints, I had first minor break down. Because I didn’t have spool mount and 3mm PLA filament is really stiff and acts like a spring, I broke a piece of guidance system in the extruder idler that guides filament onto hubbed bolt. It was a minor thing, yet if I wasn’t careful filament would push to the side and get stuck. So my top priorities were to print a spool holder and a replacement extruder idler. I managed to make both after some effort. This is also where I encountered another issue. Sometimes first level would lift of the heatbed, especially thin parts. I increased bed temperature to 65C and it seemed to help a lot. I suspect that glass is always at least 5C lower than heatbed.
My printer started to look funky with added orange parts, but I love it.
More on the spool mount.
At first I printed this mount to hold my filament spool above printer.
And here’s video of printing in progress:
While it worked, frame mount pieces were designed for a 6mm aluminum or plexiglass frame. My Replikeo frame was made out of steel and was only 3mm thick. So I imported STL file into Sketchup and modified it to fit Replike’s frame. In the process I also made some improvements. I made mount slightly longer than top of the frame and added holes for screws on the bottom to hold it in place. This worked out pretty well. You can find my design on Thingiverse.
 I also printed out those conical spool holders. They fit nicely into any size spool opening and can be used with 608 bearings for smooth rotation. Funny thing is when I was printing one of those holders, Slic3r generated weird “planes” that got printed in the space that should have been empty. Here’s a picture.

Even stranger, it didn’t happen one second one. Must’ve been some strange glitch.
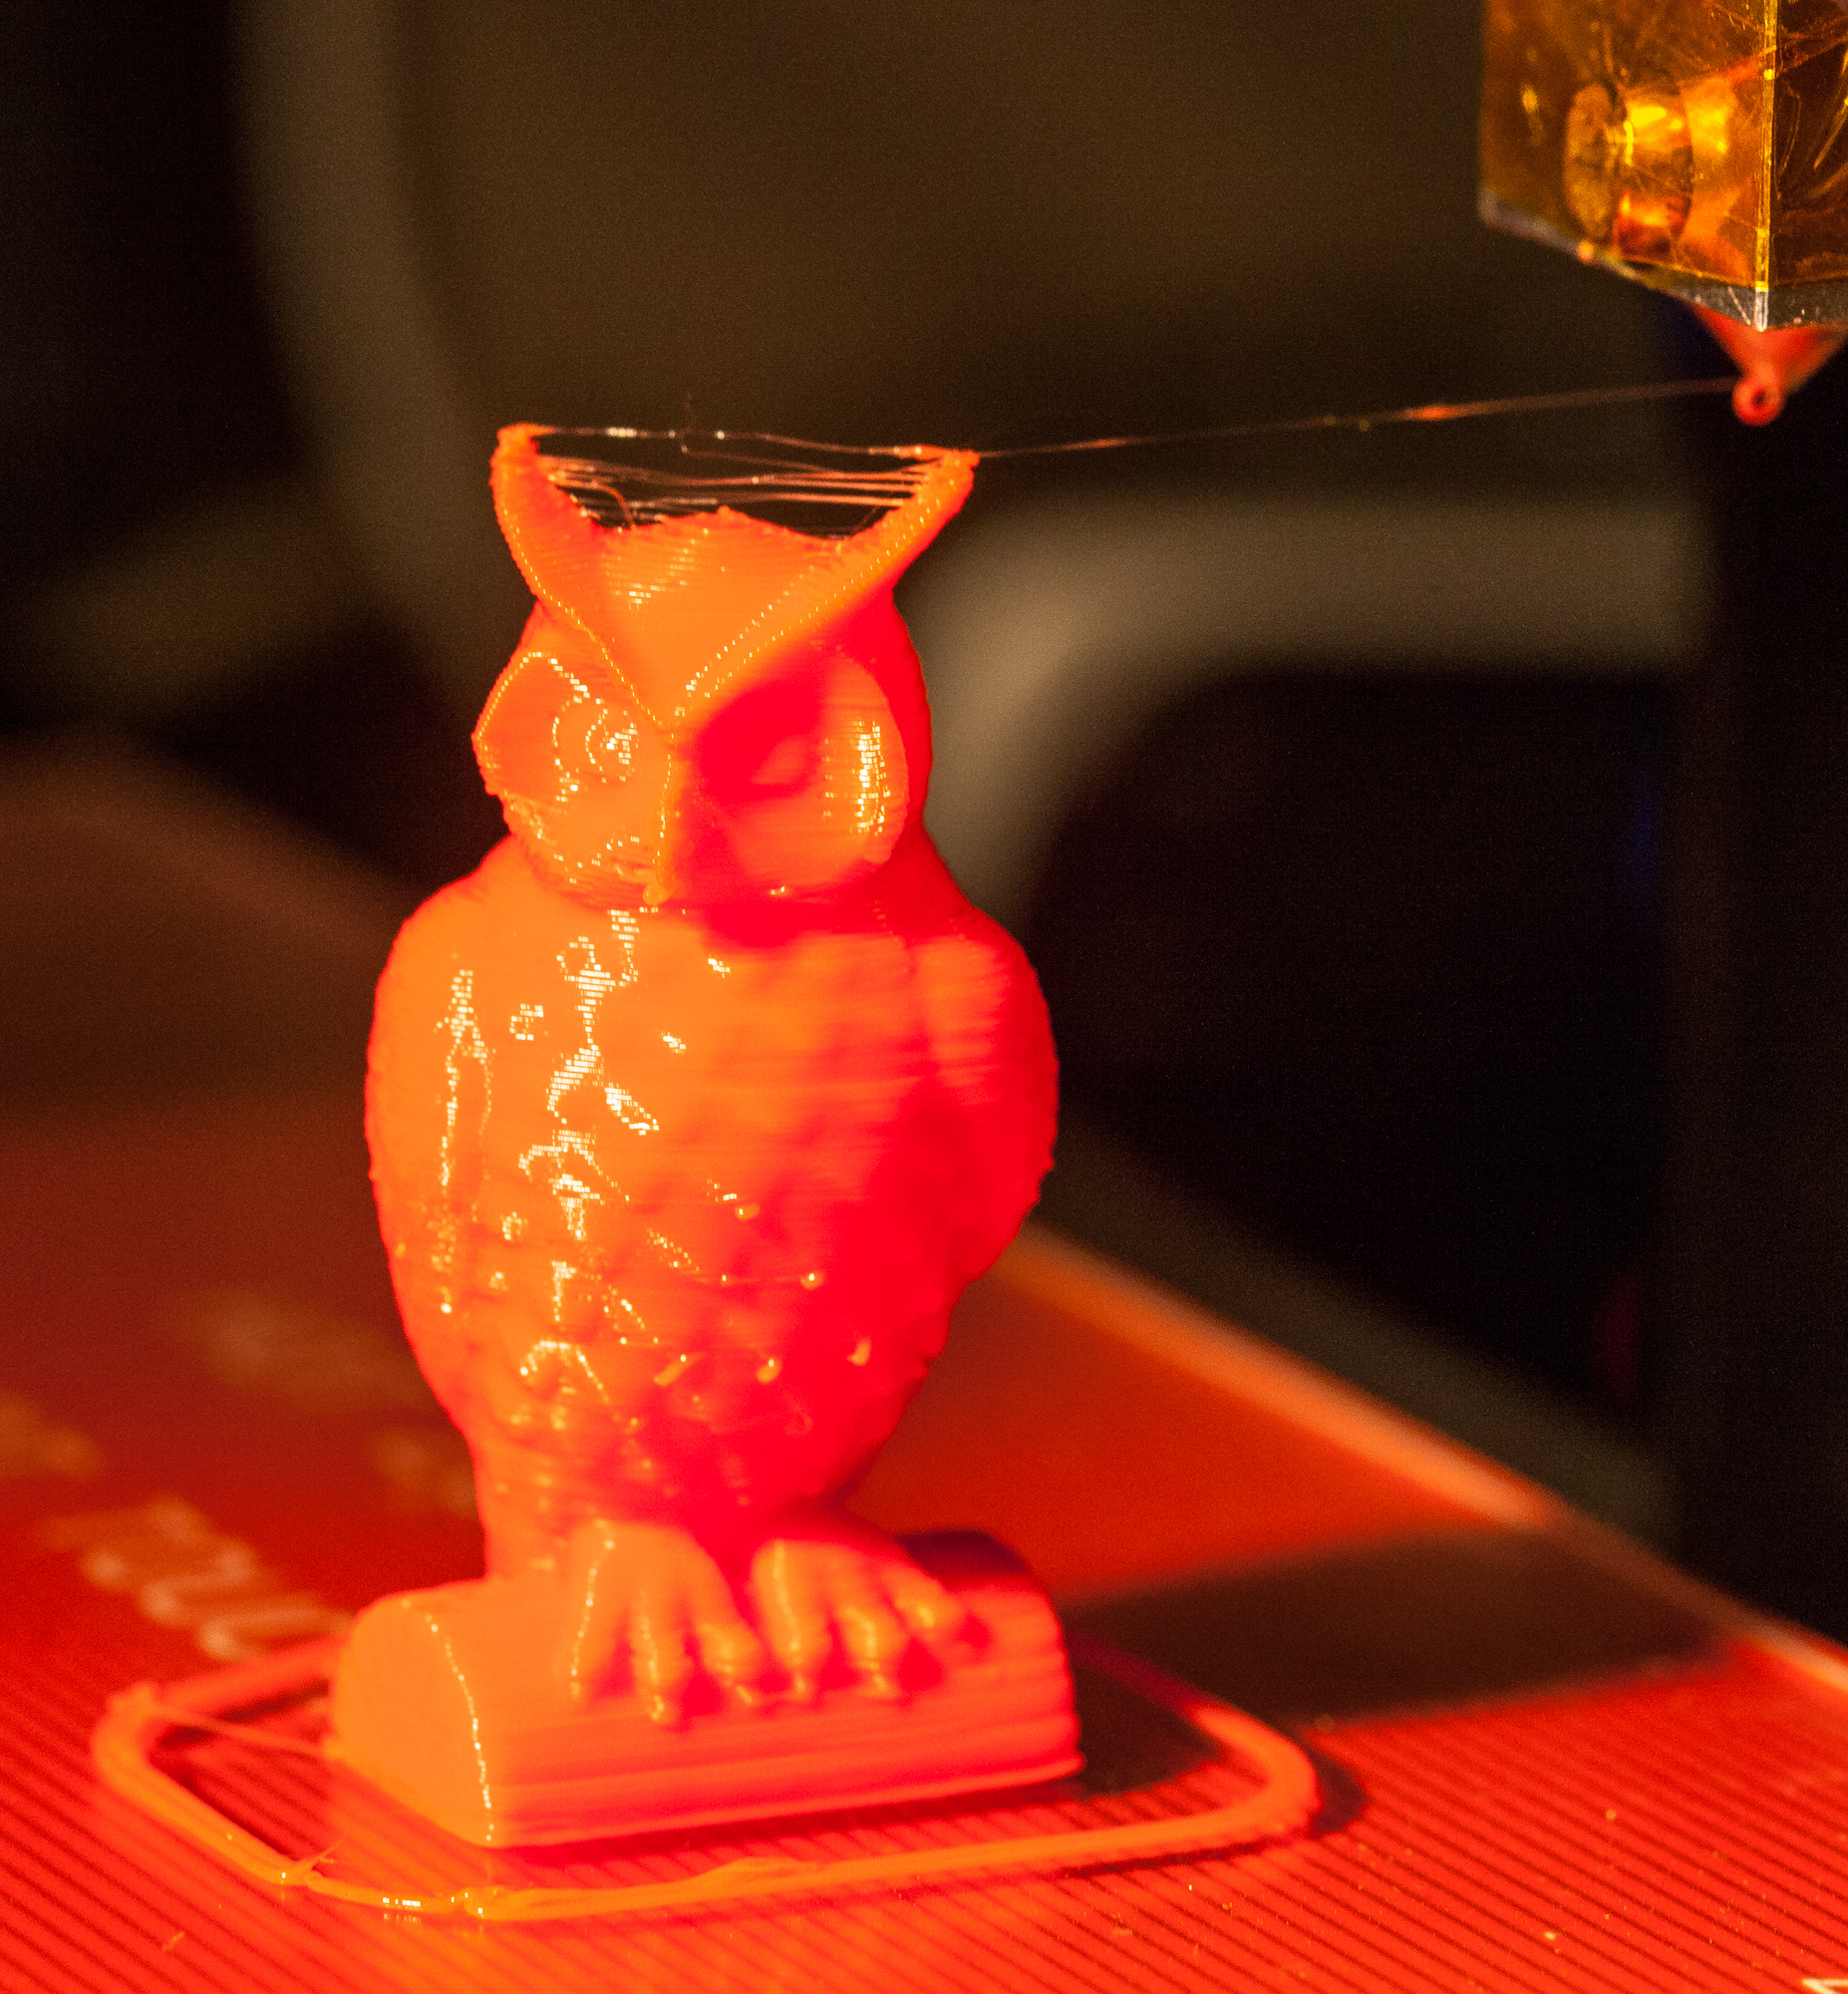
Finally last night I printed famous Owl Statue, and I think it came out pretty nice. I set layer height to 0.2 for this one, but that was pretty much only setting that I made.
P.S. I realize that some of you are interested in exact settings I used for Repetier and also might be unfamiliar with how hole 3D printing process works (as was I when I started this build). I will try to make another post dedicated to these topics, so stay tuned.
Tags: 3d printer, calibration, filament, holder, i3, prusa, prusa i3 rework, replikeo, spool